

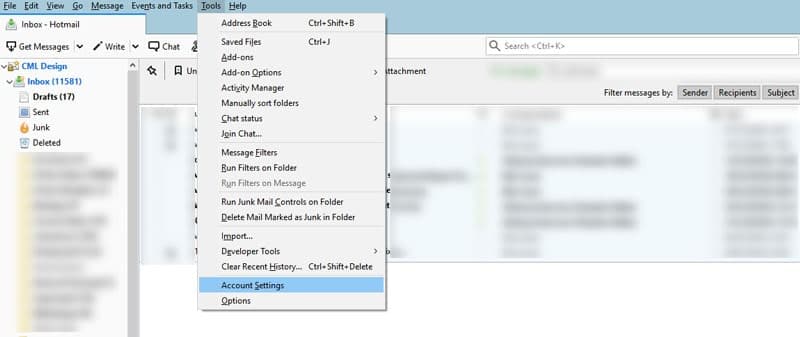
Launch the Thunderbird application and select [Account Settings] from the [Tools] menu (bring up the menu’s if they’re hidden by pressing [ALT] on your keyboard)
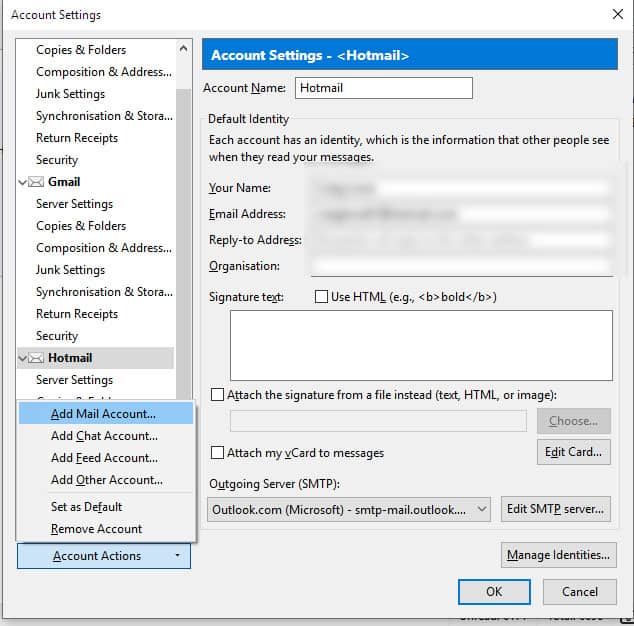
Click on [Account Actions] then [Add Account] in the next screen.
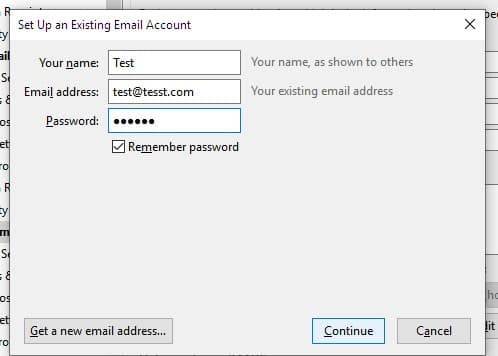
Fill out YOUR EMAIL details on the next screen then click [Continue], leaving the “remember password” box ticked if you want the application to automatically remember your password every time you send/receive email from the account.
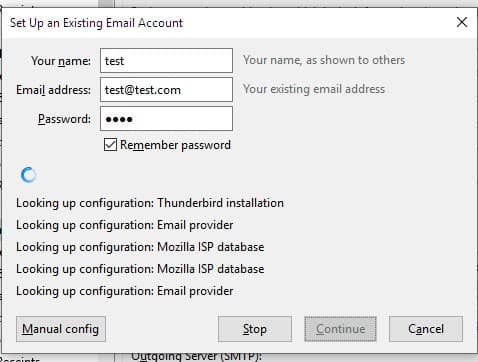
While it is searching for the configuration settings automatically click [Manual Config] if you know the settings and wish to skip the automatic process.
Finally complete the process by entering your server & access details setting authentication to normal password and re entering your password if required. Select DONE then you can test your new email address out within Thunderbird re-entering your password if prompted.
Tip: Rename your new email account and set it too default – removing any accounts you no longer use by going back to STEP 2.


